Key Takeaways
- Fungus on walls thrives in Singapore’s humid climate: moisture, poor airflow, and condensation create the perfect breeding ground.
- Hidden triggers are often the real culprits, such as leaky pipes, porous walls, or furniture blocking ventilation.
- DIY methods can help for minor cases, with natural remedies like vinegar, baking soda, and hydrogen peroxide proving safer and more effective than bleach.
- Professional help is necessary for recurring or severe infestations, as experts use industrial tools and mould-resistant treatments to stop regrowth.
- Long-term prevention is key, regular ventilation, humidity control, and proper wall finishes keep mould and fungus at bay.
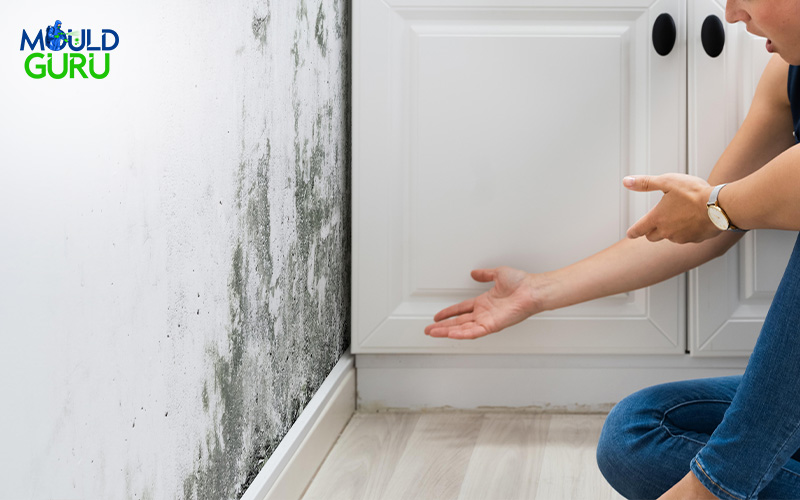
Why Fungus on Walls Should Never Be Ignored
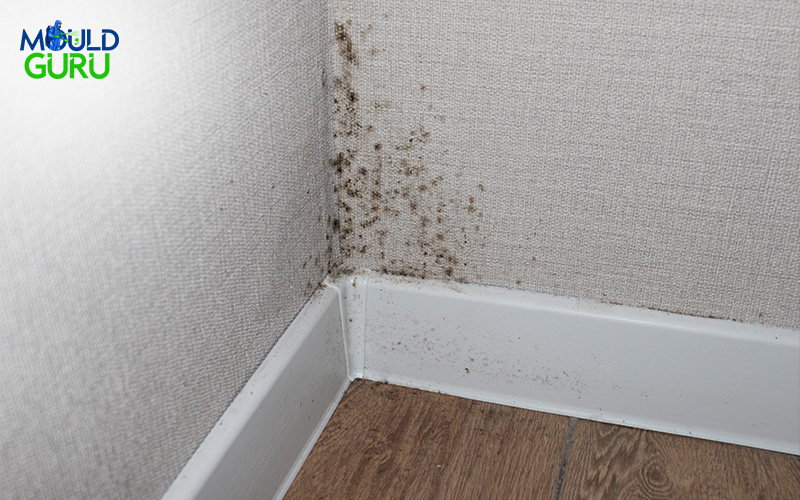
You start noticing a musty smell. Strange spots appear near the ceiling or behind furniture. The paint starts bubbling or discolouring. These may seem like minor annoyances, but they’re often signs of a deeper problem—mould and fungus quietly taking root in your walls.
The frustration is real: no matter how many times you scrub, the growth keeps coming back. It’s not just unsightly, it feels like your home is working against you. But the real concern isn’t how it looks; it’s what’s happening beneath the surface. Mould and fungus don’t just stain your walls. They release spores into the air that can trigger allergies, worsen asthma, and lead to respiratory issues, especially for children, the elderly, and anyone with weakened immunity. Over time, they can even weaken the structural integrity of your home.
That’s why understanding what you’re up against is so important. In this guide, we’ll walk you through everything you need to know about tackling mould and fungus on walls, including:
- The root causes of mould and fungus — from Singapore’s climate to hidden indoor triggers you might be overlooking
- How humidity and poor airflow contribute to wall fungus — and what simple changes can help reduce the risk
- Which DIY methods actually work — and which ones are ineffective or potentially harmful
- When it’s time to call in the professionals — plus what to expect from a professional mould removal service
Whether you’re battling a stubborn spot or simply trying to safeguard your home, this guide will give you the clarity and confidence to deal with mould and fungus on walls effectively.
How Humidity and Temperature Cause Fungus on Walls
Singapore’s climate may be ideal for lush gardens and warm beach days, but it’s just as welcoming to mould and fungus. With high humidity levels and consistently warm temperatures year-round, your walls become a prime target for these unwanted invaders. Many homeowners are surprised at how quickly mould and fungus on walls can develop, even in clean and well-maintained homes. The key culprit? Moisture.
1. Singapore’s Climate is a Mould and Fungus Haven
Humidity is the main driver behind the growth of mould and fungus on walls. While their spores are everywhere in the air, they need the right conditions to grow. When indoor humidity consistently stays above 60%, it creates a damp environment that allows spores to settle, spread, and thrive. Even small fluctuations in temperature can cause condensation, especially when outdoor heat meets air-conditioned interiors.
In Singapore, where humidity rarely dips below 80%, this constant moisture acts like a welcome mat for fungal growth. Bathrooms, kitchens, and even bedrooms can become hotspots for mould and fungus, especially in areas with poor airflow or trapped heat.
2. Airflow Matters: Why Ventilation Makes a Difference
Stagnant air is another silent contributor. Without proper ventilation, moist air gets trapped in corners, behind wardrobes, or near ceilings—places where mould and fungus on walls love to hide. A lack of movement means moisture clings to surfaces longer, giving spores the perfect chance to grow undisturbed.
On the flip side, well-ventilated spaces allow air to circulate and dry out damp spots. Simple actions like using exhaust fans, opening windows, or avoiding furniture placement flush against the wall can drastically reduce the risk of fungus developing.
3. Condensation and Temperature Differences
Ever noticed moisture beading up on a wall near your air-conditioner? That’s condensation in action. When cool air meets warm, humid air, it causes water droplets to form, especially on walls and ceilings. Over time, these pockets of hidden moisture become breeding grounds for mould and fungus. This is particularly common in rooms that are cooled quickly or inconsistently, such as guest bedrooms or storage areas.
4. Humidity Control Hacks
You don’t need to completely remodel your home to protect it. Simple humidity control strategies can make a huge difference:
- Use a dehumidifier to keep indoor humidity between 45–55%
- Leave windows slightly open during dry periods to allow natural ventilation
- Wipe down damp areas regularly, especially after showers or cooking
- Consider moisture-absorbing products in wardrobes and closed spaces
Knowing how Singapore’s humidity and temperature play into mould and fungus on walls is the first step in preventing them. With a few lifestyle tweaks, you can take back control of your indoor environment.
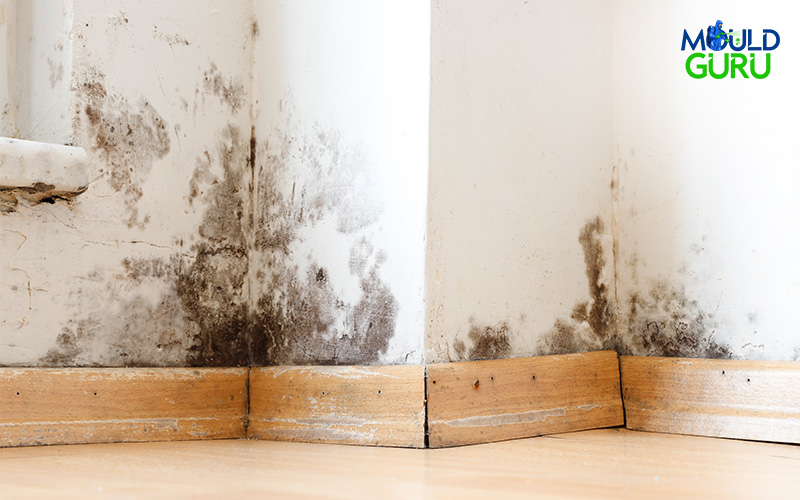
Hidden Triggers You Never Thought About
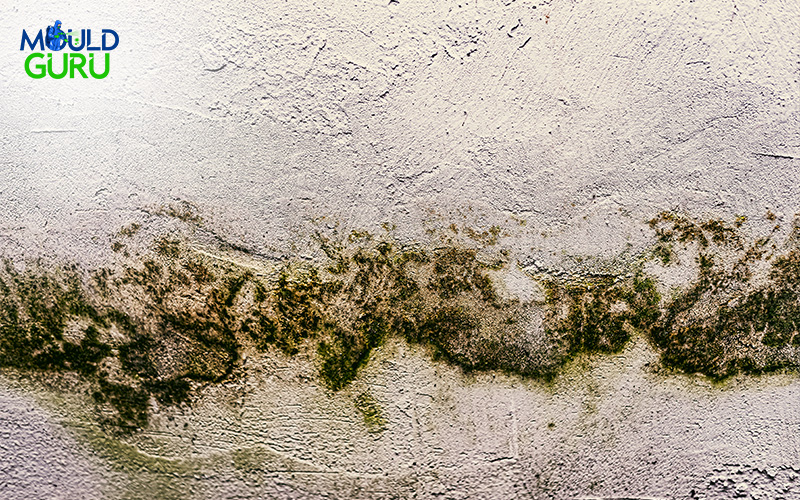
You’ve fixed the obvious—cleaned your walls, improved airflow, maybe even bought a dehumidifier. Yet, somehow, mould and fungus on walls keep coming back. Why? Because the biggest culprits are often the ones you don’t even realise are there. Let’s shine a light on some of these hidden triggers that might be turning your home into a mould and fungal paradise.
1. Leaky Pipes & Hidden Moisture
Not all water damage announces itself with a burst pipe or a puddle on the floor. In many homes, slow leaks behind walls or under sinks go unnoticed for months. This hidden moisture creates a constant damp zone, exactly what mould and fungus on walls need to thrive. Since it’s out of sight, these areas often get zero ventilation or sunlight, which makes fungal growth nearly inevitable.
A sudden patch of discoloured paint or a musty smell could be your only clue. If mould keeps reappearing in the same spot despite cleaning, it’s worth checking for plumbing issues behind the surface.
2. The Dark Side of Indoor Plants
Houseplants have a reputation for improving indoor air quality, but some of them can actually worsen humidity levels. Overwatering, especially in non-breathable pots, releases excess moisture into the air. Add to that the damp soil, which can also become a fungal breeding ground, and you’ve got a recipe for trouble.
While greenery is great, moderation is key. Avoid clustering too many plants in small rooms or placing them directly against walls. If your indoor jungle is contributing to mould and fungus on walls, consider using a moisture meter to monitor the humidity.
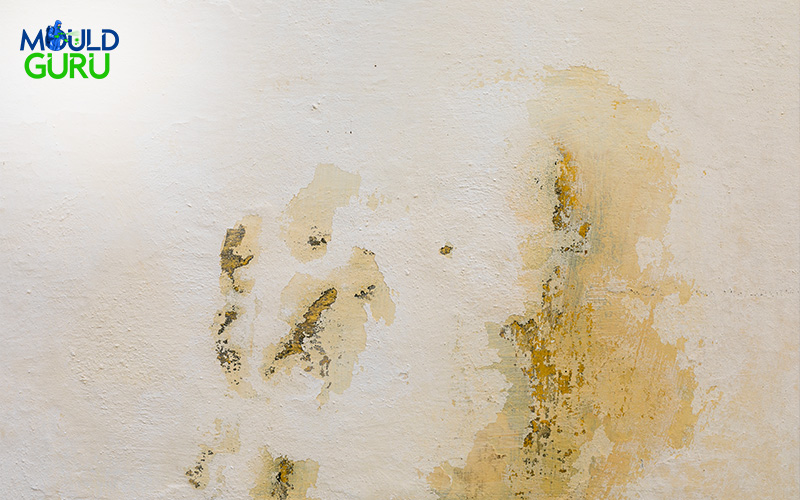
3. Porous Walls & Paint Choices
Believe it or not, the very materials used in your home could be working against you. Porous walls—common in older buildings or HDB flats—absorb moisture like a sponge. If the paint used is not mould-resistant, it can trap dampness and encourage fungal growth beneath the surface.
Switching to mould-resistant paint and using sealants on high-risk areas like bathrooms or kitchens can offer a stronger line of defence.
4. Furniture Placement: A Hidden Trap
That giant wardrobe or full-length bookshelf? It might be silently fostering mould and fungus on walls. Large furniture placed directly against walls can block airflow, preventing moisture from escaping. Over time, these hidden pockets of trapped air become warm and damp—ideal for fungus to grow.
Leave at least a small gap between furniture and walls to allow ventilation. Your space—and your walls—will thank you for it.
The DIY Mould and Fungus Removal: What Really Works?
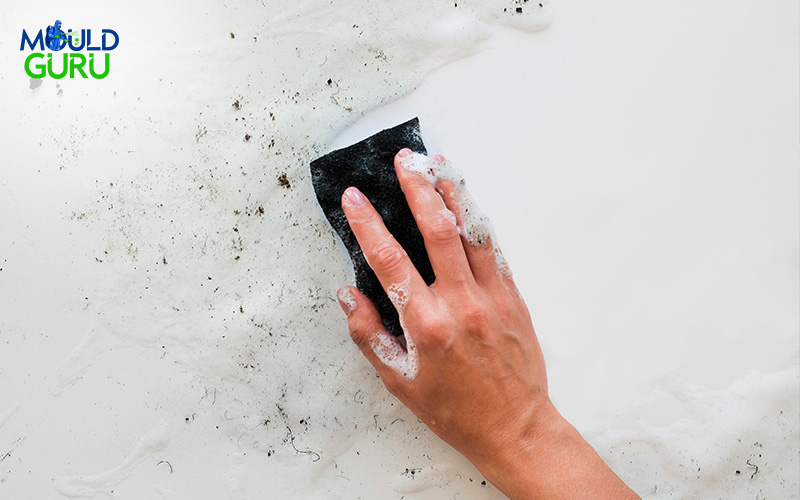
If you’ve spotted those dreaded black or green patches creeping across your interior, your first instinct might be to grab the nearest cleaning product and scrub away. But not all remedies are created equal, and some may even make things worse. Here’s what actually works when tackling mould and fungus on walls using DIY methods.
1. Bleach vs. Natural Remedies
Bleach is often the go-to choice for tackling mould, but it might not be as effective as you think. While bleach can remove surface stains, it doesn’t always penetrate porous materials where the mould roots itself. This means mould and fungus on walls might disappear temporarily, only to return a few weeks later.
Natural alternatives like white vinegar and baking soda are gaining popularity for good reason. Vinegar kills up to 82% of mould species and doesn’t release toxic fumes. Baking soda, on the other hand, helps absorb moisture while gently scrubbing away residue.
2. The Power of Hydrogen Peroxide
One of the most overlooked yet effective ways to combat mould is hydrogen peroxide. A 3% solution sprayed directly onto affected areas can kill bacteria, viruses, and fungi—all without the harmful fumes bleach produces. Leave it on for 10–15 minutes before scrubbing with a stiff brush. It’s especially handy for smaller patches of mould and fungus on walls in bathrooms and kitchens.
3. DIY Fungus-Killing Sprays
Making your own anti-fungal spray is easier than you might think. Mix equal parts white vinegar and water, or combine 1 cup of hydrogen peroxide with 1 teaspoon of tea tree oil for an extra boost. Spray directly onto the affected area and let it sit before wiping or scrubbing gently. These homemade options are effective and safer for kids and pets.
4. Cleaning Techniques That Matter
Scrubbing mould aggressively can release spores into the air, spreading the problem. Always wear gloves and a mask, and clean with slow, deliberate strokes. Open windows and switch on fans to improve ventilation during and after cleaning.
5. Preventive DIY Measures
To stop mould and fungus on walls from returning, consistency is key. Wipe down damp spots, fix leaks promptly, and run dehumidifiers in high-humidity areas. Even opening windows for a few hours a day can help maintain a drier, healthier environment.
Tackling mould and fungus on walls doesn’t always require harsh chemicals or expensive solutions. With the right DIY methods—like vinegar, hydrogen peroxide, and better cleaning habits—you can remove existing growth and prevent future outbreaks. Just remember, consistency and proper ventilation go a long way. For more severe cases, though, it might be time to bring in the pros.
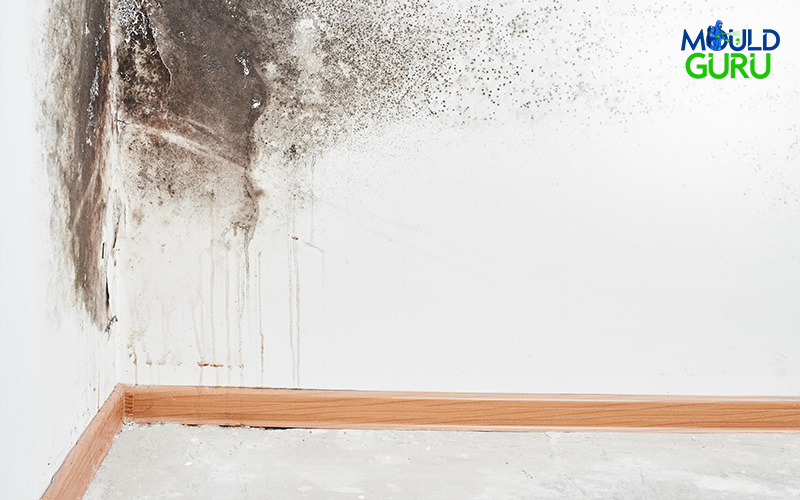
When Should You Call Experts for Fungus on Walls?
Recurring patches, stubborn odours, and suspicious dark spots creeping across ceilings and corners are often signs of a deeper infestation that home remedies can’t reach. That’s where professional mould removal services come in—not just to clean, but to resolve the problem at its root.
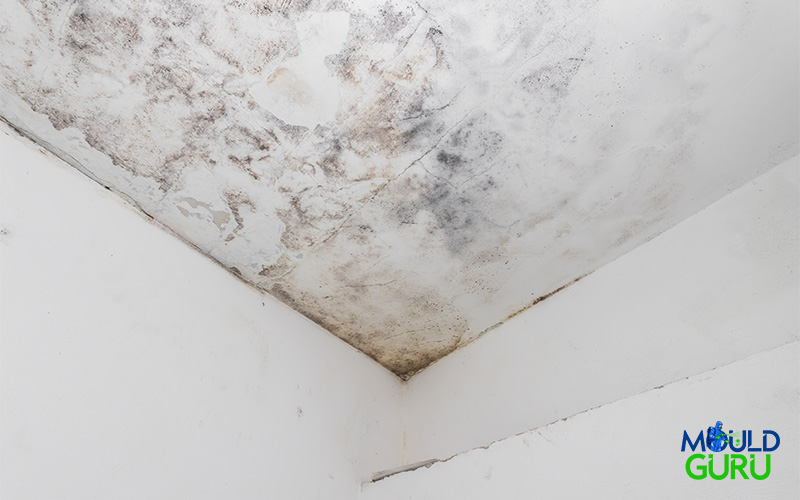
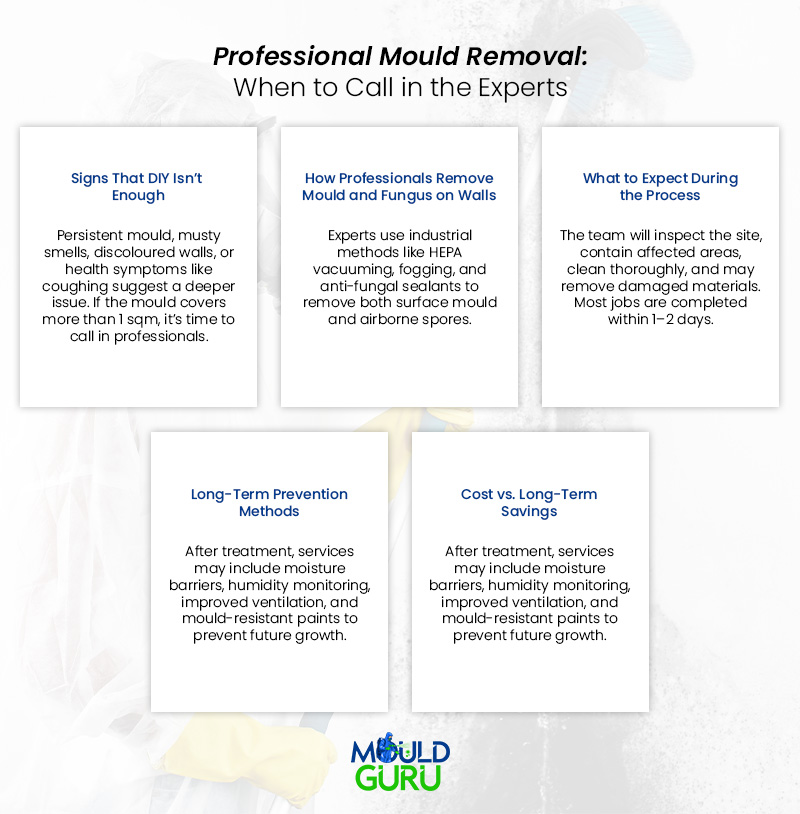
1. Signs That DIY Isn’t Enough
If you’ve already tried vinegar, baking soda, and even hydrogen peroxide, but the mould keeps returning, you’re likely dealing with more than surface-level growth. Musty odours, discoloured walls, or health symptoms like coughing or sneezing indoors could mean there’s a larger mould colony hidden behind your walls or ceilings. When the affected area exceeds one square metre, experts strongly recommend seeking professional help.
2. How Professionals Remove Mould and Fungus on Walls
Effective mould control goes far beyond just a simple wipe-down. Specialists use industrial-grade tools and techniques such as HEPA vacuuming, fogging, and anti-fungal sealants that eliminate both visible mould and airborne spores. These methods not only remove the current infestation but also make the environment inhospitable for future growth.
3. What to Expect During the Process
When a mould control team arrives, they’ll begin with a thorough house inspection to assess the extent of the infestation. Next comes containment—to prevent spores from spreading—followed by the actual cleaning and treatment phase. Depending on the severity, this may involve removing damaged drywall, applying anti-fungal coatings, and using air purifiers to cleanse the indoor environment. Most services are completed in a day or two, depending on the scope.
4. Long-Term Prevention Methods
Many professional services also offer aftercare solutions such as moisture barrier applications or humidity monitoring systems. Some even recommend minor renovations like sealing cracks, improving ventilation, or using mould-resistant paint to help you maintain a mould-free home over time.
5. Cost vs. Long-Term Savings
Though mould specialist services can seem costly upfront, they often save money in the long run. Repeated DIY treatments, repainting, or structural repairs caused by prolonged mould damage can add up quickly. In comparison, professional treatment provides peace of mind and a healthier, longer-lasting result.
If mould and fungus on walls have become a recurring issue in your home despite your efforts, professional removal isn’t just a luxury, it’s a wise investment in your home’s safety and your family’s health.
Say Goodbye to Mould and Fungus on Walls with Mould Guru
Mould and fungus on walls are more than just unsightly, they’re a persistent threat to your health, home, and overall comfort. From Singapore’s humid climate to hidden triggers like leaky pipes and poor airflow, the causes are often deeper than you think. While DIY solutions can help in mild cases, severe or recurring infestations call for expert attention.
Don’t wait until the damage worsens. If you’re noticing musty odours, dark patches creeping along your walls, or constant reappearances despite your best efforts, it’s time to take serious action by engaging a trusted mould removal company.
At Mould Guru, we specialise in professional mould removal services tailored for Singapore’s unique environment. Our team uses proven, advanced techniques to eliminate mould at its root, and ensure it doesn’t return. Whether you need a full remediation or just a professional assessment, we’re here to help restore your space safely and effectively.
Ready to reclaim your clean, healthy walls? Contact Mould Guru today for a free inspection and take the first step toward a mould-free home.
FAQs about Fungus on Walls
1. What causes fungus to grow on walls even after cleaning?
Fungus and mould often return when the root cause, such as trapped moisture, poor ventilation, or hidden leaks, is not properly treated. Ordinary cleaning removes only surface growth. For long-lasting results, it’s best to consult a professional mould specialist.
2. How can I permanently remove black mould and fungus from my walls?
Black mould and fungus require targeted treatment to fully eliminate spores and stop regrowth. Simple scrubbing isn’t enough, as spores may remain beneath paint or plaster. Our experts share proven methods on how to remove black mould safely, or you can engage our team for professional remediation to ensure your home remains clean and mould-free.
3. When should I call for professional mould treatment in Singapore?
If you notice dark patches, musty odours, or recurring wall stains despite cleaning, it’s time to seek professional help. Our mould treatment in Singapore uses non-toxic solutions and thorough inspection methods to remove both surface and hidden mould effectively.
4. How do I know if mould and fungus on walls are affecting my health?
Common signs include persistent coughing, sneezing, skin irritation, or even headaches when you’re indoors. If symptoms improve once you leave the space, it’s likely that mould is impacting your indoor air quality. People with asthma, allergies, or weakened immune systems may be more sensitive to mould spores.
5. Can I just paint over mould and fungus on walls to hide it?
Painting over mould is not recommended. Without engaging a mould specliast in Singapore to remove the source and treat the root cause, mould will continue to grow beneath the surface and eventually reappear, often worse than before. Some paint types may even trap moisture, making the problem harder to solve later.
6. How long does professional mould removal take, and is it safe to stay at home during the process?
For small to moderate infestations, professional mould remediation usually takes 1 to 2 days. In most cases, you can remain at home, although certain steps—like fogging or heavy-duty cleaning—may require you to vacate specific rooms temporarily. Your service provider will advise on safety precautions depending on the severity.
Say Goodbye to Mould and Fungus on Walls with Mould Guru
Mould and fungus on walls are more than just unsightly, they’re a persistent threat to your health, home, and overall comfort. From Singapore’s humid climate to hidden triggers like leaky pipes and poor airflow, the causes are often deeper than you think. While DIY solutions can help in mild cases, severe or recurring infestations call for expert attention.
Don’t wait until the damage worsens. If you’re noticing musty odours, dark patches creeping along your walls, or constant reappearances despite your best efforts, it’s time to take serious action by engaging a trusted mould removal company.
At Mould Guru, we specialise in professional mould removal services tailored for Singapore’s unique environment. Our team uses proven, advanced techniques to eliminate mould at its root, and ensure it doesn’t return. Whether you need a full remediation or just a professional assessment, we’re here to help restore your space safely and effectively.
Ready to reclaim your clean, healthy walls? Contact Mould Guru today for a free inspection and take the first step toward a mould-free home.